Surviving Wisconsin Winters Part 5: the Magical Warmth of Snowboard Socks

Health

snowboarder and dog

stance-snowboard-socks

I don’t intend this as a review of any specific sock, though I’ve already come to rely on Stance Socks. I only want to highlight a key feature of knee height wool socks.

While it’s only an extra few inches of wool, knee-height adds significant warmth. It’s a magic-bullet layer of insulation that boosts overall warmth, while adding zero bulk to your torso.

Though each sock covers only an additional five inches of skin, it’s special skin. It’s your extremities. So, in covering 20% more of each leg, you’re shutting down 20% of lower-extremity body-heat radiation. Stated in the inverse, you are increasing heat retention. Think of the difference a turtleneck makes. Same difference, even more so.

Really, it’s like adding a Capilene 2 long-sleeved thermal top — but adding neither bulk nor fabric-on-fabric friction to your torso. Magic!

[Animation credit:  Jeremy Thompson; Snowboarder.com]
[Photo credit:  Stance Socks]

Surviving Wisconsin Winters, Part 4: Wool — It Does a Body Good

Health

wool for overcoats

This year I have a new go-to layer for winter cycling:  an old, cashmere polo shirt. The warmth is incredible, but it’s also got the buttoned polo collar and short sleeves, so it vents really well.

In my seventh Wisconsin winter, I’ve become a wool convert. Sadly, over the years I’ve stockpiled a whole closet full of Patagonia Capilene. Don’t get me wrong, Capilene is an excellent product. It breathes exceedingly well, and it offers quality insulation without bulk. But I wish I’d spent half that money on wool, instead. It’s so much warmer than any synthetic of comparable weight. (Wool does have its drawbacks.)

And the real killer app of wool is its antimicrobial properties. Don’t we wear wool sweaters months at a time without them getting stinky? We can because of wool’s microbe-fighting powers. By contrast, we wash synthetic base layers after each wearing. I wear wool much longer. Wool thermal bottoms? I wear them three to four days between washings. Longer, even. So even though I only have a few wool baselayers in my closet, I never run out of clean pieces.

Synthetics get stinky fast. The micro-textures of synthetic fibers create the perfect spawning bed for bacteria. Bacteria causes B.O. Even Patagonia garments treated with antimicrobial chemicals have to be washed after each use. Untreated garments get stinky after a few hours just sitting around the house!

Also new for me this winter:  snowboard socks. Check out my post on wool snowboard socks.

(Image credit:  Fashion Color Textile Factory)

Surviving Wisconsin Winters, Part 3: Windproof Boxer Briefs

Health

frozen crotch

I’ve previously blogged about frozen groin syndrome when winter cycling. In that post I recommended stuffing a pair of glove liners down there to keep frostbite from one’s nether parts. My new solution is infinitely more elegant. Smartwool makes a pair of merino boxer briefs with a well-placed windproof panel. I present to you the Smartwool PhD NTS Wind Boxer Briefs:

boxer briefs windproof Smartwool

I wish I’d had them on when riding home from a Super Bowl party the other night. Temps were in the low single digits. The ride took an hour. I thought I had layered up perfectly. What a joy it was to ride hard and generate lots of heat, my torso warm and my Levi’s 501 Cords venting the perspiration.

I didn’t have an extra pair of glove liners with me, so my groin got cold. Painfully cold. Then, after a half-hour, the area went mercifully numb.

The trouble was getting home and having the blood return to my frozen crotch. If you’ve ever spent a lot of time in serious temps, skiing, ice fishing, hiking, you know all too well what happens when you get home. The blood returning to your numb finger tips and toes means hours of stinging, searing, aching pain.

Yeah. That.

I’ve had these windproof boxer briefs for a month, now. This product absolutely works. I’ve ridden my bike three different days in subzero weather. What a difference. They’re expensive, at $50. But that’s the cost of living the outdoor life in Wisconsin. Either that, or stuffing your drawers.

Love Your Bike? Secure It Well

Health

Cronus locked up

How to Choose a Great (And Not so Great) Bike Lock

When I bought a fancy bike last year, I felt I needed to upgrade my security for it. Holy cow, is there ever a swamp of options to wade through when choosing a bike lock. Cable locks. U-locks. Chains. Kryptonite. Onguard. Blackburn. Abus. And they’re all so different.

After many hours of research, I picked a very secure lock. Then immediately had buyer’s remorse. I wish someone had told me to consider weight and convenience. My purchase, a Kryptonite U-lock, model “New York Lock M-18WL,” for $120.  While very secure, at 6.5 lbs it’s a total pain to carry around. After a few months, I got tired of schlepping that monster everywhere and had to find another, lighter-weight lock.

Back to the drawing board!

Two basic design principles had originally led me to buy the New York Lock M-18: a narrow shackle and 16mm thickness (or greater). These two design features neuter the two most common attacks against U-locks.

1) Bottle jacks: Bike thieves can bust open nearly any U-lock using a twenty-dollar tool available at any hardware store called a bottle jack, as demonstrated in this video . . . (Darn, YouTube has taken down all videos of bottle jacks defeating U-locks.) That is, unless the shackle is too narrow to fit a bottle jack inside the “U”.  If the jack won’t fit, it’s useless against the lock. Here’s a photo of a bottle jack beginning to warp a U-lock shackle: (photo credit needed)

bottle jack attack

2) Bolt cutters: A shackle with a thickness of 16mm is too thick for the jaws of even the largest bolt cutters. Less than 16 mm can easily be cut by bolt cutters, like this:

The little brother of my New York Lock M-18, called the New York Fahgettaboudit Mini ($90), has both a narrow shackle and an 18mm thickness. And it’s lighter and smaller; its shackle is only 4 inches long, instead of 8 inches, making the NYF Mini only 4.55 pounds. I could have saved myself more research by just going with it. http://www.kryptonitelock.com/Pages/ProductInformation.aspx?PNumber=997986     

But that’s still heavy. Worse, an even bigger problem is its shackle is actually too small to be practical. It’s so small, people ride around with the NYF Mini stuffed in their back pockets. For portability, that’s a pretty great feature. However, the shackle is so narrow, it severely limits the ways in which one can lock up a bike. It can lock a bike frame to a bike rack, but without room for either of the wheels. Plus, if your frame tubing is oversized, as mine is, good luck using the NYF Mini on a thicker street pole (like a parking meter). It just won’t work. And the lock is too small to lock up just the rear wheel, as shown below with a larger lock: (photo credit needed)

bike lock proper

The Sweet Spot

I eventually found a U-lock by OnGuard, the Brute Mini ($70), which hits the sweet spot between strength and weight. At 16.8mm thickness, the Brute Mini is impervious to bolt cutter attack. Yet the lock weighs in at a svelte 3 lbs. The shackle is also about 15% larger than the NYF Mini. With just that much additional size, I rarely have difficulty locking up my bike. Yet the shackle is still too small to fit a bottle jack.  (See my photo at the top of this post. There’s no way to fit a bottle jack inside the shackle.)  http://onguardlock.com/products/u-locks/brute-mini-u-lock/

Bike Locks I Ruled Out

Lots of people use cable locks because they’re cheap and convenient. They’re lightweight and easy to stow. But against bolt cutters, they get snipped like ribbons.  “Steel-jacketed” cable locks are a little better because they’re fatter. But they’re better only to the extent that a thief would need a second tool to get through it: one tool to flatten or saw through the (very thin) outer steel jacket, and bolt cutters for the inner cable. See the outer jacket separated from its inner cable, below. (Photo credit:  http://lettershometoyou.wordpress.com/ )

sliced-cable-lock-stolen-bike-lettershometoyou

Case-hardened hex link chain might seem like a solid option, especially since it is marketed to motorcycle owners. But the thickest hex chain is only 14mm. Thus, a pair of 42-in. bolt cutters can quickly dispense with even a $150 chain, as seen here:

Plus, a three-foot length of 14mm hex chain will run about 10 pounds. And that’s not including the lock! There is a security chain manufacturer in the UK called Almax, which produces thicker, non-hex links. But, again, the weight. Such beasts were never meant to be carried on a bicycle. Maybe for locking up at home, but certainly not to carry on one’s daily commute.

In my research I came across the very cool TiGr Lock. Sadly, I found it just after its Kickstarter campaign had expired. Doh! Missed my chance to get one for $100. Now that they’re on the market, the 0.75-in. version is $165, and the 1.25-in. version is $220. http://tigrlock.com/ Wired Magazine reviewed the TiGr Lock as “deliver[ing] the holy grail of locks–strength and lightness…” The 1.25-in version is immune to bolt cutters, and weighs a mere 1.5 lbs. Be still my heart.

But I’m just not able to plunk down $220 for a bike lock. Maybe if I hadn’t already squandered so much on that $120 albatross, the New York Lock M-18.  Sigh.

(UPDATE: I spoke too soon in praising the TiGr Lock. Have a look at this video:

Granted, the TiGr Lock being cut in the video is the 0.75-in. model. But the bolt cutters snip that lock so easily, it’s hard to believe the wider version would make much difference. (The 1.25-in. model is wider, not thicker.)

Two Attacks NOT to Worry About

Ever heard of the liquid nitrogen attack? In bike thievery lore, a lock can be shattered if frozen with liquid nitrogen, then hit with a hammer. In the wild, liquid nitrogen is simply not a common threat. Here’s a discussion of it: http://www.creekcats.com/pnprice/bikelock.html

Also rare is the angle grinder attack. The first time I saw an angle grinder in action, my heart sank. An angle grinder can dispense with any lock listed here in 90 seconds, quicker with any lesser lock. Much quicker. The good news is they cause a scene. They throw a shower of sparks and shriek like a banshee:  https://www.youtube.com/watch?v=bphyY1pnjg8  To guard against an angle grinder attack, one simply needs to park one’s bike where 90 seconds of sparks and screeching noise would be unwise for the thief. (Photo credit needed.)

angle grinder

Final Notes

No matter what type of lock you use, there’s one security principle that undergirds all scenarios:  how long you leave your bike unattended. The longer a bike sits in one spot, the higher the chances it will catch the eye of a bike thief. Also, knowledge that the owner won’t return anytime soon puts the bike thief at ease. That’s the worst kind of bike thief: the brazen thief, the confident thief. Even if your bike is secured well, given unlimited time, bike thieves will take what they can. (Photo:  Luca Masters)

stripped bikes

Surviving Wisconsin Winters, Part 2: Dry, Cracked Skin on Hands

Health


Ever get that dry cracked skin on your knuckles or at the side-edges of a fingertip? I can’t tell you how many different hand creams I’ve tried to prevent it in these Wisconsin winters. It’s a real problem. It’s not only the physical discomfort. It’s the anxiety of being out and about in the world with what are essentially open wounds. (Entrepreneurs shake a lot of hands!)

I’ve had to pull out the big guns. I’ve tried a couple of expensive, specialty products and some not so specialty home remedies. Turns out the best of the lot is also the cheapest. Namely, lip balm.

Lip_Balm_Beeswax_nocap (1).jpg

Chapstick, Burt’s Bees, Kiehl’s Facial Fuel, etc. — give any of them 36 hours with your cracked-skin convalescence, and they’ll put you on the road to epidermal ease. (Make sure you wash your hands before applying, or risk an infection.)

Also important, put away the liquid hand soaps ’til Springtime, especially the antibacterial ones. Get yourself a gentle bar soap with a lower pH.

Ethical Wool?

Health

wool-305684_640

I’ve recently blogged about my newfound love of woolen activewear (the flipside of which is my move away from synthetic fabrics). Here’s an update to that post.

As a winter cyclist I’m amazed at the high-performance qualities of wool. But my attention has been drawn to the question of wool as an ethical product. Can one choose wool ethically?

Yes. Or at least wool can be relatively ethical, compared with the wool fiber industry of only a few years ago. Back then it was impossible for apparel manufacturers to fully trace the supply chain of raw wool. In other words, even if manufacturers wanted to offer garments made of ethical wool, the info did not exist for them to avoid “mulesed” wool. Mulesing is the horribly inhumane animal farming practice defined here.

Nowadays an industry initiative called Zque guarantees the supply of certified, non-mulesed wool. Patagonia, Ibex, and Smartwool now use Zque suppliers, exclusively. The manufacturer Icebreaker Merino has mounted a similar effort called BaaCode.

None of this completely resolves the question of wool as an ethical choice. There’s still the issue of animal cruelty in shearing operations, not to mention the bigger question mark of humane animal treatment in mass production, in general. But it is progress.

[Image credit: Pixabay]

Gore-Tex vs. eVent: Two Waterproof/Breathable Cycling Jackets Go Head-to-Head

Health, Writing

showers pass Elite 2-0

What I’m interested for this post is the waterproof/breathable (WP/BR) fabrics of two different jackets I own: Gore-Tex vs. eVent.

I’m actually not going to review the jackets, per se.  What I will do is save you all from the fatal mistake I’ve made, an honest mistake that has ruined one of these two jackets.

Pictured above is my Showers Pass Elite 2.0 jacket, $250 retail.  At the bottom you’ll find my Patagonia Super Alpine mountaineering jacket, $600 retail.  Very different market segments, I know.  The WP/BR laminate in the Patagonia is the high-end Gore-Tex Pro Shell, while that of the red, Showers Pass jacket is an unspecified, entry-level product from eVent.  So, not apples and apples.  I can’t offer up the definitive Gore-Tex vs. eVent head-to-head competition.

Or can I?

Both Gore-Tex and eVent fabrics are laminates, both using an active layer made of PTFE (polytetrafluoroethylene). The best known PTFE product is Teflon. The PTFE used in WP/BR fabrics is manufactured by stretching a PTFE solid to be a very thin, microporous membrane. The micropores are what make the membrane at once breathable yet waterproof. The micropores are too small to let in liquid water, such as rain or melted snow, yet large enough to allow moisture vapor to pass through, such as perspiration evaporating from your skin or baselayers.

The PTFE membrane must be protected from contamination. Contaminants such as skin oils and dirt will permanently clog unprotected micropores.  Just how to protect the PTFE layer is where Gore-Tex and eVent part ways.

  • Gore-Tex covers the PTFE membrane with a protective film of polyurethane (PU) on the interior side of the jacket.
  • Rather than covering the whole PTFE membrane, eVent uses a proprietary method to somehow coat the interior of each micropore with an oil/dirt resistant chemical.

Wet System vs.  Dry System

Gore-Tex is the so-called “wet system”: it vents perspiration only after vapor has collected as liquid on the inner surface of the jacket. As liquid, the moisture necessarily seeps through the PU film by basic diffusion, from the area of higher pressure (inside the jacket) to the area of lower pressure (the outside air). This diffusion forces the liquid water through the PTFE layer. So for Gore-Tex, venting is a two-step process: body moisture (vapor) must first condense on the inner surface. Only then can it diffuse through the membrane.

On the other hand, eVent is the “dry system”: sweat vapor vents “directly” through the membrane. It need not collect as liquid, first.  In that sense, eVent is the “more breathable” of the two products.  The two-step process of Gore-Tex venting definitely takes more time.

The problem with eVent—and this is essentially why I’m writing this post—is that its micropores are still vulnerable to contamination by skin oils and dirt. Yes, the micropores are treated with an oil- and dirt-resistant chemical. But get it dirty enough– i.e., clog the pores really badly—and the PTFE loses its breathability. Permanently.

Thus, eVent garments require laundering way more often than you’d think. We’re talking cycling garments, so, “regularly” means laundering after heavy use.  Read: every, or every other, hard ride. If you ride through the winter, this means washing the jacket two or three times a week.

Washing it often isn’t a terrible hassle. But as everyone knows, washing machines are hard on clothes. So we’re caught between a rock and a hard place. Care for this jacket properly, and shorten its lifespan. Or, launder it less, and risk clogging the micropores.

In my ignorance, I managed to do both types of damage. First, I simply didn’t know of the need for regular laundering. I treated my Showers Pass jacket like a jacket. I washed it about once every four weeks. Micropores? Pretty damn, well clogged. Breathability went to near zero. When I learned of my mistake, I began washing the jacket weekly. Just one Wisconsin cold season meant laundering the jacket probably twenty times. Some of the breathability returned (though, mostly not). All the washing totally destroyed the DWR coating on the jacket exterior. Now the jacket no longer sheds water. Rain and snow don’t get through to the inside, blocked by the PTFE layer. But they do saturate the outer fabric of the jacket, sapping warmth.

Conclusion

I love my Patagonia jacket, while my Showers Pass jacket makes me sad. The Showers Pass jacket no longer performs. I’m pretty angry that the care tag didn’t alert me to the need for special care. I only learned of it on the web, after the damage was done. I wonder what percentage of eVent users know they should wash an eVent jacket as if it’s a sweatshirt? I also wonder, if laundered as often as necessary, will an eVent jacket survive even a single season?

On the other hand, I’ll be wearing my Patagonia jacket for years to come. It seems completely unfazed by three winters of serious abuse. And Gore-Tex requires no special care. So I won’t be laundering it to death.

layers vert

Easton Bell Sports: Now That’s Customer Service

Entrepreneurship, Health

Easton Bell $0.00 highlighted

Just wanted to send out some well-deserved praise for a company with excellent customer service.

Last December I damaged my Giro snowboard helmet.  I bent the metal snap of the goggle strap on the rear of the helmet.  (I mean the strap at the rear that clamps down over the strap of ski goggles).  After unsnapping the strap to remove my goggles, I found I could no longer close the snap.

I use this snowboard helmet for winter cycling.  As I don’t have a car, I need it on a daily basis.  This was an especially cold winter here in Madison.  I generally switch from wraparound glasses to ski goggles below 15°F.  While I don’t use goggles everyday, this is Wisconsin!

So, I emailed Giro, asking where I could buy the replacement parts.  I wasn’t optimistic.  In this age of disposable products and terrible customer service (I’m looking at you, AT&T, major airlines, Chase Bank, etc.), I half-expected to be told there are no replacement parts, if I were to be answered, at all.

They actually got back to me the very next day.  It was Customer Service Rep Amber Thomas, from Easton-Bell Sports, the parent company of Giro.  She said she would put the replacement strap in the mail, and I should receive it by the end of the week.  Sure enough, the strap arrived two days later.  I was thrilled to be able to use my goggles the rest of the season, without having to buy a brand new helmet.

(For those of you who say you don’t need the helmet strap to use goggles:  while running errands around town on my bike, I’m constantly removing my goggles and putting them back on.  This is much, much simpler to do with your helmet’s goggle strap latched to your goggles, as if the goggles were an integrated part of your helmet.)

When I wrote Amber back expressing my gratitude, she replied, “We just want you to have a fully functioning helmet.”

What you’re looking at in the image above is the packing list that arrived with the replacement parts.  Notice the figures listed in the “price” columns.  That’s right, “$0.00”

But, wait.  There’s more.

Several years back, I had a great little micro-light for the top of my skating helmet.  This was back in Houston, where the heat and humidity made Rollerblading at night the natural choice.  You need a light to skate at night, obviously.  Some of you may know this micro-light I’m referring to, called The Flea, by Blackburn.  They still make the Flea, but back then the Flea charged off of any battery via a little charging device.  My charger had a wire break loose.  I emailed Blackburn about it.  Same as with my helmet, Easton-Bell Sports, the parent company of Blackburn, sent me a replacement charger at no cost.

We’re talking a company with nearly $1 billion in annual revenue.  So how do they succeed while giving away equipment at no charge?  By making lifelong customers like me.  That’s how.

Just FYI, after selling one of its several manufacturing divisions, the company has recently rebranded itself as BRG Sports.

Layering For Cold Weather: Technical Clothing Systems

Health

layers vert

Body moisture:  it’s your worst enemy when dressing for winter cold. You can be wind-proofed and layered to excess. But if your layers aren’t venting that moisture, the minute your body stops radiating heat, the moisture trapped in your clothing will chill you like a Perdue chicken.

My first winter riding around Madison, I used to either underdress and regret having ever left the house, or I’d over dress, get damp with perspiration, and experience bone-chilling, near-hypothermic misery. Now, after three winters in Madison, I’ve got my layering systems down to a science. I’ve kept notes in increments of 1° or 2°F, from 40°  down to -1° F, both for cycling and walking.  (See below.)

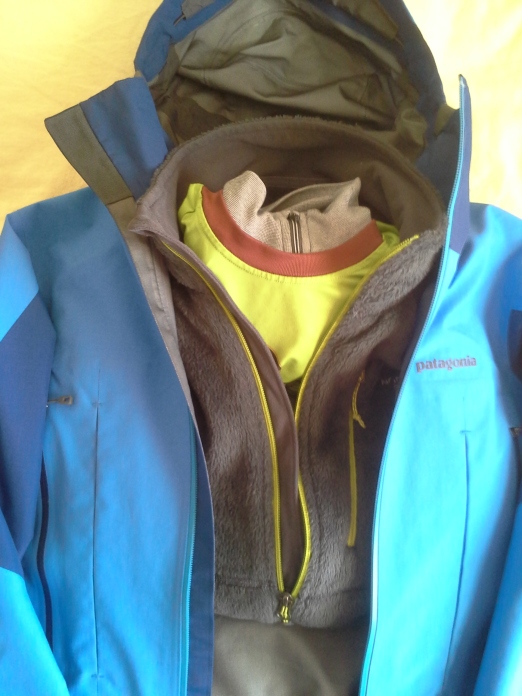
I’ve also filled out my wardrobe of base layers, mid-layers, and technical garments. I prefer Patagonia’s synthetic products. They insulate and vent moisture as well as anything out there.  As a bonus, many of their products are made from recycled plastic bottles.

Just a few things to emphasize before presenting my layering systems.

I pay little attention to my legs. While I do wear a wool insulating layer under my jeans or cords, I leave my legs exposed enough to prevent them from perspiring.  Why?  Because I don’t own any high quality pants that are BOTH windproof AND breathable. Wearing lesser quality windproof pants, my legs get sweaty and damp–the last thing I want when it’s cold. Pants made from Gore-Tex Pro are very expensive. I do own a Gore-Tex Pro jacket ($600), as venting the body core and arms is much more important than the legs. Plus, I bike 95% of my trips around town (no car!), and on my bike my legs pretty much take care of themselves in the warmth department.

However, crotch warmth needs to be accounted for. (Duh!) In conditions of bitter cold (5° F, or lower), I’ll stuff a pair of glove liners down my crotch, and we’re good!

The head is easy. Above 20° F, I wear my aero-helmet with a headband and cycling glasses. Below 20° F, I stay warm in a snowboard helmet. I switch to ski goggles below 12° F  or when it’s windy. The key to snow-helmet comfort is a venting system, one which can be opened or closed on-the-fly. The head generates serious BTUs of heat, so when the air is in the upper-teens, or when pedaling hard, opening the vents keeps one from overheating.

One last thing to note. I avoid windproof insulation under my hardshell. Windproof fleece, such as Patagonia R4 or soft shells with a Gore-Tex layer, work really well as outerwear; they’re my go-to outer layers in milder weather (>30° F). But when worn as an insulating layer, they don’t breathe well.  The consequence:  trapped moisture close to the body.

Below, I’ve condensed my notes (layers for cycling), in increments of approximately 5°. The notes specify weather conditions, time of day, and the success/failure of the layers listed. What’s not specified is the type of cycling: running errands around town, i.e., bicycle trips of 15 to 25 minutes.

Message me or leave a comment if you want the full version (or if you’d like my notes for walking/hiking, instead).

Abbreviations

“Cap” = Capilene (Patagonia)
“Cap 3 crew” = long sleeve crew-neck
“Alpine Jacket” = Patagonia Super Alpine Jacket
“Gore Softshell” = Gore Bike Windproof Softshell
“Hi-loft” = either Patagonia R3 jacket or North Face Radium jacket

35-deg, 11pm, 8mph wind
— perfectly layered, home from High Noon Saloon
Cap1 stretch SS
Cap1 stretch LS
wool LS crew
Cap4 Full Zip
Gore Bike softshell
Capilene scarf, took this off 1/2-way home
wool leggings + jeans
glacier gloves w/ med. liners
Keen hiking boots, Smartwool socks

29 – 30 deg, 12 pm, 9 mph wind
— a bit over-dressed to Co-op; the backpack added warmth
Note: started out the ride with good warmth built up
lighter wool leggings + cords
Capilene 2 LS (this should’ve been a Cap 1, and the Cap 4 could’ve
Cap 4 1/4-zip been Cap 3)
Alpine jacket (possibly could’ve been softshell)
med-weight balaclava (allowed you to leave jacket 1/2-zipped)
lobster gloves + best liners
Keen hiking boots, wool socks
aero helmet + headband, glasses
backpack

30 – 26 deg, 7 – 8 pm, 13 mph wind
— ears/jaws got cold on way home, to Co-op
Note: started out the ride with good warmth built up
lighter wool leggings + cords
Two-layer insulation
Capilene 1 SS (torso was perfect)
Cap 4 1/4-zip
Gore softshell
(would’ve been nice to have mid-weight balaclava for ride home at 26 deg)
lobster gloves + best liners
Keen hiking boots, wool socks
aero helmet + light-weight headband, glasses
backpack

25 deg, 5pm, 5 mph wind, 96% hum.
— just right to State Street, then to Co-op
— was a bit chilly when you had your Cap 4 part-way unzipped
lighter wool leggings + cords
cotton TCap 4 full-zip
Alpine Jacket
lobster gloves + best liners
Keen hiking boots, wool socks
aero helmet, headband
glasses
backpack

22 – 19 deg @ 3 – 5 pm, 13 mph wind
— to State St. (overheated on the way out!! Just right on way home.)
wool leggings + jeans
cotton SS
Smartwool top
North Face Hi-loft fleece
Alpine jacket
lobster gloves, windproof cyc. gloves
wool socks
Keen hiking boots
aero helmet w/ headband
Campy balaclava

17 – 20 deg, 7 – 8 pm, 14 mph wind
— to Co-op (maybe also to Trader Joe’s)
wool leggings + cords
Silk weight Cap SS
Cap2 crew [should’ve deleted this]
Cap4 Full Zip
Alpine hardshell
lobster gloves w/ liners (hands totally fine!)
snowboard helmet (Note: no headband — just tightened chin strap)
Keen hiking boots, Smartwool socks [toes a bit cold when riding hard]
(carried in bag: Capilene scarf, 2nd pr. glove liners, balaclava)

30 – 16 deg, 5 – 8 pm, 9 mph wind
— to Mason Lounge
Note:
lighter wool leggings + cords
Cap 1 SS
Cap 2 1/4-zip[carried Cap 4 full-zip for ride home]
Alpine jacket
med-weight balaclava
lobster gloves + best liners
Keen hiking boots, wool socks, light wool socks
snowboard helmet + glasses

14 deg, 6 pm, 9 mph wind
— to State St. then to Absolutely Art
— torso was too warm; removing the Cap 2 crew was good;
wool leggings + cords
Cap 1 stretch SS (this should’ve been LS, and no Cap 2 layer)
Cap 2 crew [took this off!!]
Cap 4 Full Zip
Alpine hardshell
ski gloves w/ windproof cyc. gloves + liners (hands good until very end)
snowboard helmet
Campy balaclava
Keen hiking boots, Smartwool socks + wool footies
— (feet good until way home from Jenifer St. Mkt.)
(carried in bag: Capilene scarf, 2nd pr. glove liners)

14 – 11 deg, 2 – 4 pm, 4 mph wind
— to Manona Terrace then to Jennifer St. Mkt.
— torso a bit too warm to Manona Terrace; legs/feet/hands perfect
— hands & feet freezing on way home from Jenifer St. Mkt.(probably b/c boots & gloves were a bit damp inside
— should’ve taken gloves off when browsing in stores)
wool leggings + cords
Cap 1 stretch SS
Cap 3 crew
Cap 4 Full Zip
Alpine hardshell
lobster gloves w/ windproof cyc. gloves (should’ve added liners later) snowboard helmet
Keen hiking boots, wool-blend socks (that’s all you had clean)
(carried in bag: Capilene scarf, 2nd pr. glove liners)

10 – 9 deg., 12-1p, 9 mph wind
— too warm!
lighter wool leggings + jeans
Cap 1 stretch SS
Cap 3 crew [had to remove this; should’ve been Cap 1 LS, could’ve rolled sleeves]
Cap 4 Full Zip
Alpine Jacket
heavier balaclava (Gore)
lobster gloves w/ best liners & light liners
Keen insulated boots, wool socks
snowboard helmet
Anon goggles
backpack

6 deg., 3p, 7 mph wind
— just right!
— to Co-op
Cap 1 stretch SS
Cap 2 quarter-zip
Hi-loft Full Zip (North Face)
Alpine Jacket
heavier balaclava (Gore)
lobster gloves w/ best liners and windproof cyc. gloves
Keen insulated boots, wool socks
snowboard helmet
Anon goggles
backpack

5 deg., 7p, 5 mph wind
— over-warm (had excess body-warmth built up + backpack, espec. on way home when backpack was heavy)
— to Co-op
>>>Next time, whenever you’ve got excess body-warmth built up, downgrade the Hi-loft layer to Cap 4
wool leggings + cords
silkweight Cap SS [could’ve deleted this b/c of the backpack]
Cap 3 quarter-zip
Hi-loft Full Zip (North Face) [Or, this could’ve been Cap 4
Alpine Jacket
— unzipped 1/4
— body a little too warm b/c of the backpack
heavier balaclava (Gore)
ski gloves w/ best liners and light liners
— hands were fine
Keen hiking boots, wool socks, lightweight wool socks
— feet perfectly fine
snowboard helmet (no headband)
Anon goggles
backpack

15 – 4 deg., 5p – 11p, 5 mph wind
— just right
— to Square to get bus to Greg’s; ride home from Greg’s
two silkweight Cap SS
Cap 4 full-zip
Hi-loft Full Zip (North Face)
Alpine Jacket
[most everything was comfortable, except my crotch!! Nearly frost bit. Should’ve stuffed lightweight glove liners down there.]
heavier balaclava (Gore)
lobster gloves w/ best liners and windproof cyc. gloves
— hands were fine (surprisingly! You were riding pretty hard the whole way home)
Keen insulated boots, heaviest wool socks
— feet perfectly fine
snowboard helmet (no headband)
Anon goggles
backpack

1 – 4 deg., 1 – 2p, 13 mph wind
— just right to doctors appt.
Cap 1 SSCap 1 LS (a bit too warm; rolled up sleeves on way home and was perfect)
Cap 4 full-zip
Hi-loft Full Zip (North Face)
Alpine Jacketcrotch: glove liners!!
heavier balaclava (Gore)
lobster gloves w/ best liners and windproof cyc. gloves
— hands were fine!
Keen insulated boots, wool socks
— feet perfectly fine
snowboard helmet
Anon goggles
backpack

-1 deg., 7p, 12 mph wind
— to Old Fashioned
lighter wool leggings + cords
Cap 1 stretch SS
Cap 3 1/4 zip
Hi-loft Full Zip (North Face)
Alpine Jacket
heavier balaclava (Gore)
lobster gloves w/ two pr. liners
Keen insulated boots, heavy duty wool socks
snowboard helmet (no headband)
Anon goggles

ice storm

Food and Drink, Health

ice storm

We came out of Karaoke Kid and I had to ride home on my frozen bike.  For the two hours we were karaokiing, my bike was outside on a pole, getting sleeted to death.  On my way home, nothing worked.  Not my brakes, not my shifters.  Couldn’t hear the usual zippy-hum of my studded tires — they were encased in ice.